 Looking for an easy project to help you declutter? Here it is!'
Found this on one of my favorite DIY sites, I made mine a little different than hers though. Here is my version and I will list her site at the bottom.
I went to Ikea and found these really light wood magazine holders. They came in a two pack for about $10
If you are wanting to paint them, then go ahead and prime them!
For my first one I used some old brown paint we have had in our garage FOREVER! After I painted I realized that the only side that would be showing when I mounted this onto my wall would be the short panel with the hole.....oh well....
So this side here would be showing...
I also painted the edges to give it more dimension.
Now for the "top" of your shelf. I wanted some cute scrapbook paper for my top. So I had to cut the paper to size. This is how I did that....
Put some tape down on the wood
Then line up the paper with the corners and press down onto tape to secure.
Flip over so paper is now on bottom and trace along the curvy line with a pen or pencil.
Take paper off and discard tape carefully. Don't Rip the paper doing so.
Now cut along traced edge so it will come out fitting perfectly on your shelf.
Now modge podge it on! Make sure you do a coat on top of paper to seal it and protect it.
Now its time to mount this baby! Pre drill two holes onto the two sides where your screws will go. This will make it easier to put in the screws.
Now take your shelf to your corner of choice and secure with the screws. Let me tell you, I did this by myself, no hubby included! If I can do it...YOU can too!
And place whatever you like onto the shelf!
This one I put above my couch so it can hold all our remotes.
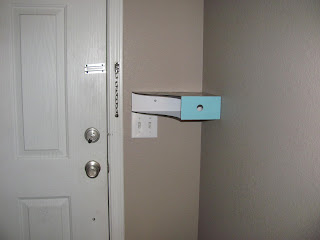
I made another one for my front door. Hopefully now all the mail, keys, wallets and what not will go into this and NOT on my table!
Now I just need to figure out something to put with this...it looks a little naked all alone....
Hope you enjoyed this one! It was so fun doing this project, it was really easy...which is my favorite!
Original project found here


No comments:
Post a Comment